Free HEIC Converter – Bitwar HEIC Converter software always hopes to provide the best technology or features to satisfy customer needs and satisfaction. We hope to give the best user guide or supports users by offering tutorials and steps when using our software. This article below will show you how and where to set the format conversion setting during conversion.
Gentle Reminder: Please install Bitwar HEIC Converter from our official website: https://www.deliheic.com/ before continuing with the tutorial!
Steps to Set Format Conversion Setting
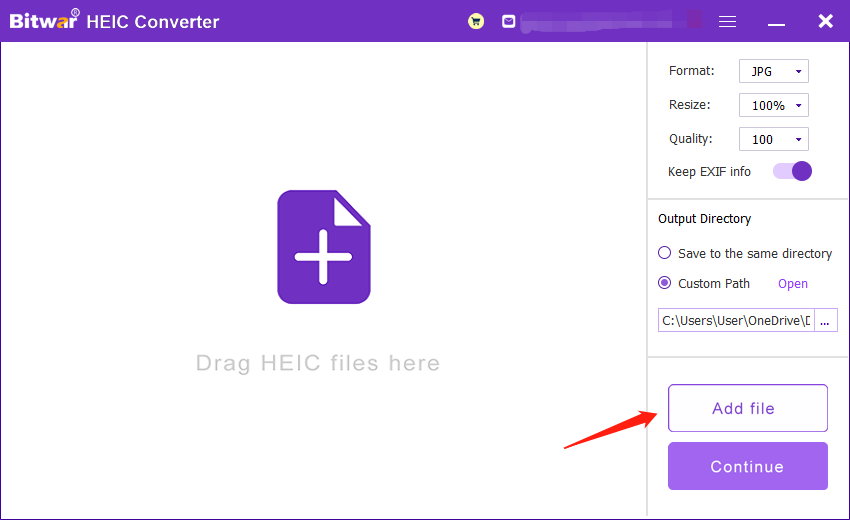
Step 1. Launch the software and click “Add File” to upload the pictures you want to convert into the software.

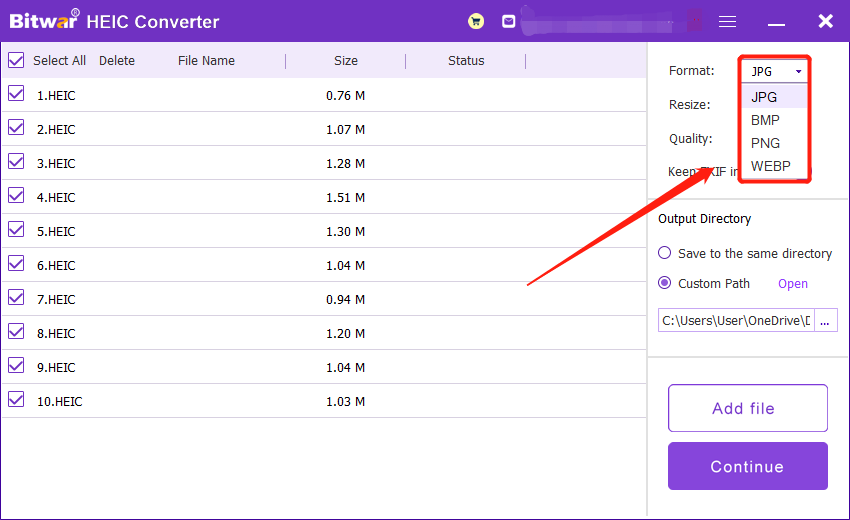
Step 2. After uploading, you can choose the File Format on the right side of the interface. You can choose one out of the four formats: JPG, BMP, PNG or WEBP.
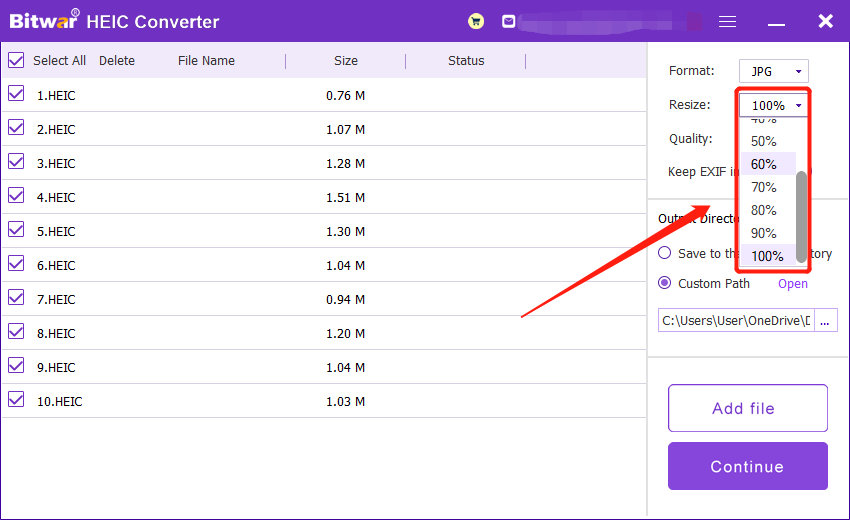
Step 3. Then, in the next column, you can resize of the images according to your need. (Kind Reminder: If you wish to keep the original size of the photos, we recommend to choose 100%)
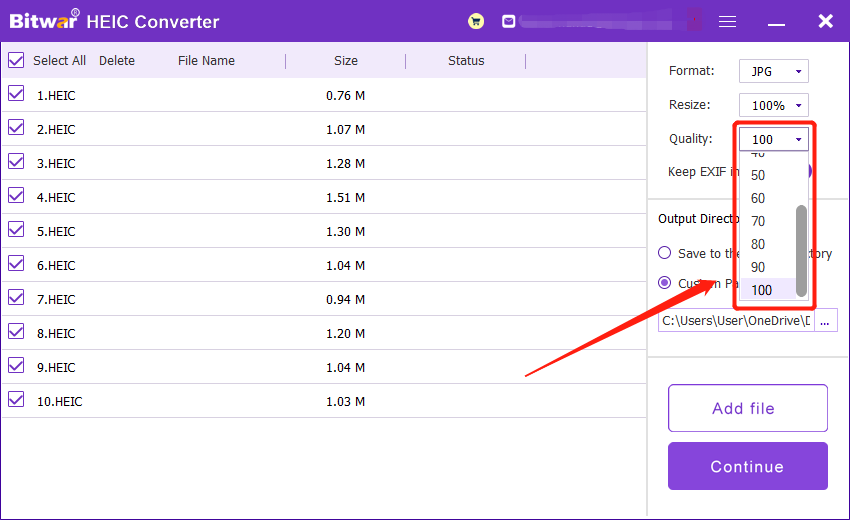
Step 4. Then, you can choose the Quality of the images at the bottom column of the Size menu.
Step 5. Lastly, you can decide whether to keep the EXIF information of the original file.
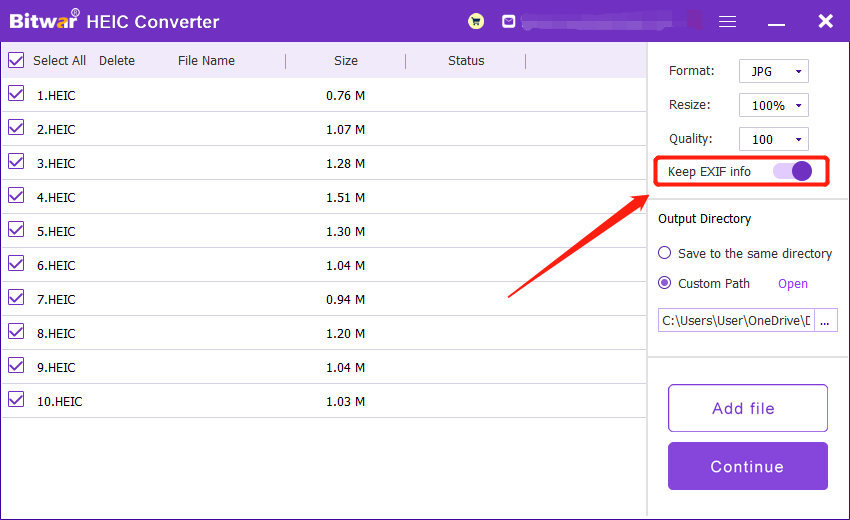
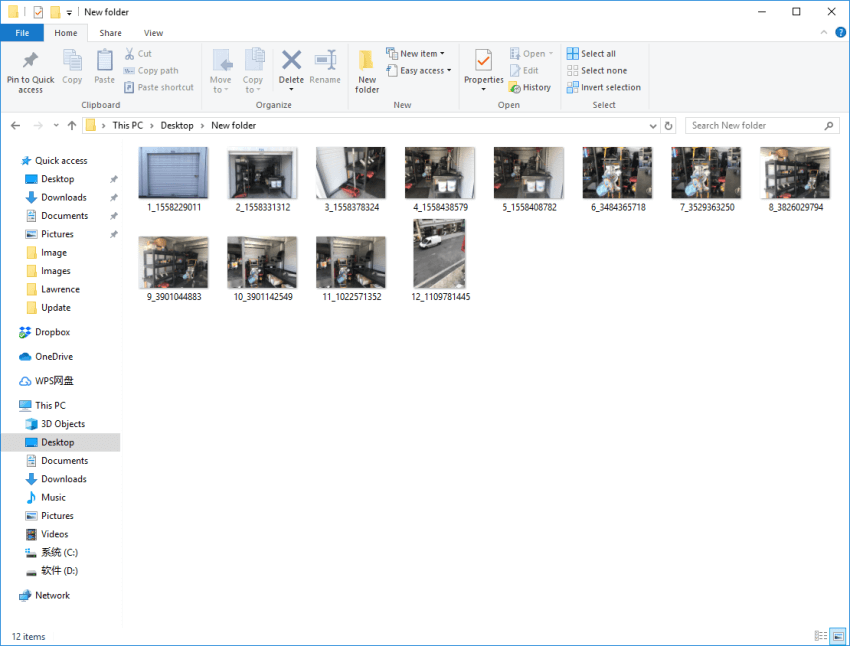
Step 6. After finish settings, click “Convert,” and all the photos will be successfully converted into the files format that you wanted. You can open and view the images from the new directory folder to check the results of the conversion.

The tutorial above is to help users to understand the setting features of the software entirely. We hope you can maximize the features and manually customize the setting by yourself in the future! Hope you like our tutorial and share with your friends about Bitwar HEIC Converter! Please contact our customer service if you encounter problems or you need further assistance.